Thursday, March 3, 2016

Transform Your Cabinets into Whiteboards


A few months ago, I decided to get the courage up to try out this spectacular whiteboard paint. I had began co-teaching with the resource room teacher and with all of the resource room students, I did not have near enough board space. 

I like to provide my students with daily practice on the whiteboards rather than worksheets, as it is more engaging for them. They can't wait to get to the whiteboard every day to do the activities/math problems written under their name. 

This is what my cabinet looked like before I transformed it into a whiteboard.


I used this dry erase whiteboard paint that I purchased from Home Depot. This box is $20 and will cover the doors of about 3 of these cabinets. (I only painted the two doors of the cabinet). 


Painted right on a laminate surface and a few months later, still holding strong! We use them daily. This paint is just amazing! Erases and wipes down clean and smooth just like a commercial whiteboard. No smearing or staining!! 
I'm planning to do my other cabinets very soon....but here are some things I learned along the way for next time and when you do yours! 

 1. These particular cabinets or other laminate cabinets require 3 coats. I used no primer!
2. Wait at least 24 hours between coats. The package directions state I believe 15-20 minutes, but this doesn't work for laminate and a straight up and down door that is not lying down flat. I followed the 15-20 minutes and my paint was not ready for a second coat. The first coat began to bunch up and peel in many spots.
3. Use a sponge roller to apply, not a brush.
4. Use really good painters tape to tape up any plastic handles on your cabinet. I taped my plastic door handles with regular masking tape and the paint seeped through getting all over the handles. I thought no biggie...nothing a little acetone can't fix!! Well the acetone began eating the plastic! So needless to say, I still have whiteboard paint on my handles if you look closely. My principal mentioned that if it really bothered me I could use black electrical tape to cover them! LOL! I'm surprised I haven't done this yet! If you only have metal on your cabinet, acetone will work like a charm! It did on my hinges and cabinet locks.
5. Last and MOST important!!! Don't make the same mistake I made and mix it all at once. There are two cans in the kit that you mix together to activate. It has to be used within 1 hour of mixing, so once you mix it you can't save it. Not only did I mix it all at once and had to do all three coats within an hour, I was forced to waste the remainder which could have done two more cabinets. Since I didn't know this, my other two cabinets weren't prepped and ready to paint.

I recommend to do three cabinets, which is what I have left to do....mix only a third of each can. Apply one coat on all 3 cabinets. Mix another third 24 hours later and apply a second coat to each cabinet, and 24 hours later mix the last third and apply the third and final coat!  

My students and I absolutely love our whiteboard cabinet! It's allowed me to utilize all of my space and given me the additional whiteboard space that I needed! And despite the mistakes I learned from, this cabinet is very functional for what my intentions were and I can't wait to see how much more awesome my other cabinets are going to look! 

Hopefully these tips will help you in transforming your cabinets into whiteboards!!


Tuesday, February 9, 2016

XtraMath! Free Math Fact Fluency Practice!

My students and I love XtraMath and can't believe that it is actually free! I've been using XtraMath in my classroom since last school year! It's a web-based math fact practice program that builds your students' math fact fluency in addition, subtraction, multiplication, or division. 

One session lasts approximately 8-10 minutes. My students do one session every day. I just love the format of this program.

If a student does not answer the math fact within the allowed time, the answer will faintly appear as you see below allowing the student to answer the math correctly. This helps the student to learn the fact. The keypad to the right can be hidden for students that prefer to use the computer keyboard to answer.

If students key in an incorrect answer, the incorrect answer will show as wrong, as well as the correct answer for the student to enter.
Students can see the ones they've mastered in green and the ones they will be working on next in gray.

 In the Race the Teacher session, targeted facts are repeated over and over each time they are answered incorrectly, providing a great amount of repetition for your students. 

 Students receive feedback throughout their session!
 And yes, this free site also provides simple "to the point" class or individual reports. Navigation through the site, printing reports and changing students' program is super quick and easy!
On the individual student report I can see exactly which facts my student needs more practice on. I can see the ones correct, incorrect, and the facts they were timed out on. 


Students can also do XtraMath at home and parents can monitor the reports too!

I have Scholastic FASTT MATH available at my school and my students and I still prefer to use this free site! I love the repetition it provides, the teaching of each fact, the reports, the student feedback, the parent involvement, and the simple navigation!!! 

Check out XtraMath for your classroom here!


Monday, February 1, 2016

100th Day Trail Mix & Freebies


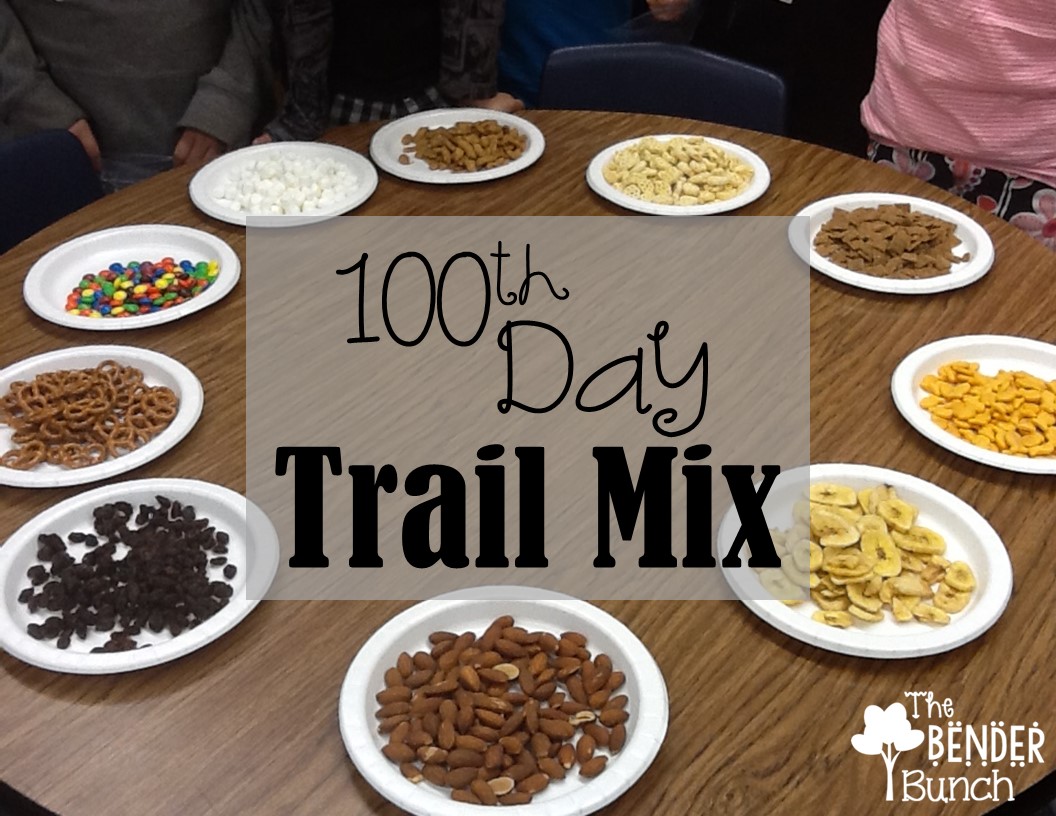
We celebrated Day 100 today!!!! I needed to change it up since I have had some of these students for 4-5 years. So...we did 100th day Trail Mix!!
We talked about how ten 10's make 100 using our base ten blocks and counted by 10's on our fingers. We put out 10 plates of 10 different items.
Items included:
pretzels
banana chips
goldfish
almonds
raisins
Chex cereal
Honeycombs
M & M's
marshmallows
sesame sticks

We gave each student a baggie with their name written on it. Students went around the table counting out 10 items from each plate to add to their baggie. 


This was great counting AND fine motor practice for some of my students. 

They were proud to show off their own Trail Mix they made themselves!!

Then they got to enjoy!!
 This student didn't waste any time!!! Haha :) :)
I put the leftovers from the paper plates into one gallon size ziploc baggie and will use it for a class snack!

For a couple more ideas, you can grab a couple of 100 Day printables here and here.

Have you celebrated your 100th day yet?

Tuesday, January 19, 2016

Show & Tell Tuesday

We have a brand new linky party on the block!!! Show and Tell Tuesday, hosted by "Forever in 5th Grade." The third Tuesday of every month teachers will get to participate in the oh so fun activity that our students love so much....SHOW & TELL!!! :) And even better than our students....we get to show & tell up to FOUR things!!! Our students would go crazy!


Student Led Conferences
I am so so excited about how well my student-led conferences went!!! This was my first time doing student led conferences. Keep scrolling at the end of this post and you can read all about it.


My Velcro arrived!
I finally ordered my Velcro from Feiner Supply and I am so excited to get it! Check out these beautiful rolls of Velcro coins! No more sticky cutting...just peel and stick! The Velcro coins pictured are the 1/2 inch coins and have 1440 coins on each roll (hook and loop on separate rolls), for just $16 a roll. Grab this deal here.

 AMAZING TREE
This tree is AMAZING and SO much fun for the kids to observe growing throughout the day! This all happens in a six hour period!!! We started it first thing in the morning and it was fully grown by the end of our school day! Get this tree experiment for your class from Steve Spangler Science here. 
 TPT SITEWIDE SALE!
I'm participating in a TpT Sitewide Sale starting tomorrow! Get up to 28% off of all The Bender Bunches Resources all day Wednesday and Thursday! Visit my store here and use the code at the top of the TpT page at checkout!

Click on the button below to enjoy more show & tell or to link up your own!
 

Saturday, January 16, 2016

Student-Led Conferences in the SPED Classroom


When our principal announced that everyone at our school would be doing student-led conferences this year, I first thought, my students? Student-led conferences??

While I knew she would make an exception for my students...I am always determined to provide my students access to EVERYTHING that their typical peers have access to and set very high expectations for them. So I began to think of ways to make this work for my students! If they can do it, my students can too!! :) 

Well let me just say, I won't be going back! I will be doing student-led conferences for all of my future conferences! I am so excited to share the success with you! 


After some brainstorming, I came up with the idea of a scavenger hunt. Who doesn't get excited over a scavenger hunt, right?! 
Students had to show/complete 10 different activities with their parent(s) and cross them out as they were completed. 
I placed one of these little numbered cups with a different letter in each activity center/area. Each time an activity was crossed off they received a letter for that activity. 

Once they had completed all ten activities and had earned all ten of their letters, the parent and their child had to use the letters to spell out my mystery phrase to both win a prize!

The mystery phrase was "Student Led," of course! It worked out perfect that it was 10 letters!
Students got to choose a prize from our class treasure tree.
Parents got to choose a prize from this basket! I also had candy bars and some other cool stuff in the basket, but forgot to take a picture at the beginning. The parents were just as excited as the kids to get a prize!


For my non-verbal, lower functioning student, I edited her scavenger hunt sheet to fit her curriculum and included independent task boxes that she was currently working on. So many of the boxes on her sheet read, "Task Box 1," "Task Box 2," and so on. 

One of the 10 activity squares on the scavenger hunt sheet was a "free choice" activity so that students had the opportunity to show their parent(s) one thing of their choice in the classroom.

I didn't tell my students anything about the scavenger hunt prior, but we did practice what they would be showing and doing with their parents prior to conference day so they could be prepared!

Here are a few photos of my students leading their conference!


It turned out better than I ever imagined. It brought a tear to my eye, watching how well my students did and how proud they were as well as seeing how surprised the parents even were!

I allowed 45 minutes for each conference, which ended up being the perfect amount of time. And although I didn't have to double schedule any students, you could easily have multiple families in your room doing this at once.

I love that the students were involved! In the past, students didn't even attend. It was just me and the parent(s). Now rather than just a traditional conference where I go over data, assessments, attendance, behaviors, etc. with the parent...now the parent can actually see firsthand what their child is doing and learning every day in their classroom! And when students actively participate in their learning, they are empowered!

Never second guess your students, they may just surprise you!

Thanks a Bunch,